7-14/12/21 - Week 10/11
For the past week, I have been texturing my character which has gone mostly well. At first, I felt a bit stumped in stylised texturing since I have only really done it for environments and I needed a bit of a refresher anyway. I decided to make a small mood board with the sort of texturing I wanted to recreate. I also ended up watching a few tutorials to try to take some tips from it. What I found was that stylised textures, even in characters have quite a lot of pre-baked shadows and highlights to really emphasise the edges and crevasses. I was mainly researching for the face on my reference board as I felt this was one of the most important places to get correct as this is one of the most stylised areas.
So, after intaking this information I started with the face. I think this is probably the most successful component of the textures as I spent the most time on it and added the most detail. Something I really struggled with was roughness variation, I couldn't see much of it on my references but I knew I needed to add at least a bit to convey how skin looks properly. I hope that I have ended up with a reasonable balance that is both realistic but stylised enough to fit with the style I went for. I also did some tweaking on the amount of detail I was adding, initially I added a lot of freckles and not as much shading but referring back to my references I found that it was a lot more heavy in terms of lighting and not at all as heavy in flaws. Changing this definitely helped me to get back to the smooth, stylistic presentation.
I then tackled the hair which was interesting, I decided to make it a metal and play around with the roughness that way as it would create an interesting sheen that I could see in my references without the hair looking wet. If this doesn't work out in unreal the way I want it to look I will instead try perhaps creating some form of shader on it, as I would like to keep the metallic sheen.
With the jacket, I had to play around with some of the segmentation a bit since I wanted to include some of these block colours to break it up a bit. I ended up having it along the bottom of the sleeves and jacket. I liked this as it mirrored the boots ending off the hip waders.
I also needed to add in the fish logo on the back, in the end I went for a cartoon Atlantic salmon, which is the same type of fish as the hat. This was inspired by an image I found, I redrew it, trying to keep the same flow of the shape whilst also adding my own twist on it to make it a bit less cheery and a bit more similar to my own style.
In terms of the props, I have ended up switching up some of the maps. I realised I made a mistake as I'd counted the hip waders as one part instead of two different pieces, so I ended up with no space for the hat. I moved this to the props and this worked out quite well, though this will make it probably need a 1024. This should be ok though I will need to readjust some of the sizes of the maps and perhaps make more maps have a normal and roughness one size smaller.
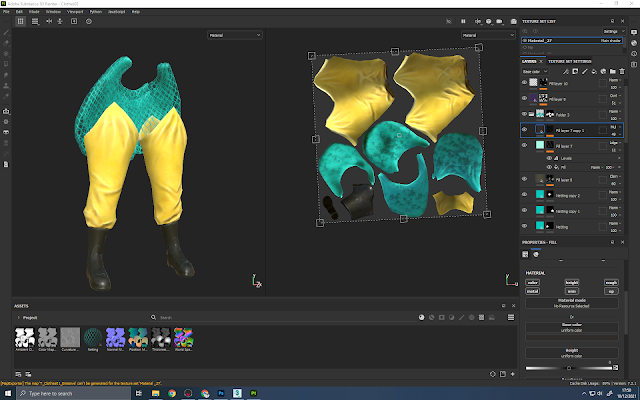
The clothes weren't too hard to tackle as it was mainly just finding the right balance between the amount of detail and roughness variation - still including detail and grime so you could tell she deals with fish and works on a boat, but at the same time not adding too much to make it look more in the semi-realism range. I ended up just adding a lot of detail highlights to make it look sun damages and some drops of water/grime around to show that her clothes were slightly wet and had some fish oils on her.
For this set specifically, I made a material in designer for the netting. Initially I was going to make this from scratch in max but doing it in designer turned out a lot easier, but I did have to play about with rotation and how the seamed linked together a bit more. I think in the end it looks quite good though.I then went on to texture the props for my scene, this wasn't too difficult and I just used the rules I did before so that the stylisation matched each other. I added some puddles onto the ground and I think this added a nice level of detail and represented that it was supposed to be near a port/the sea.
Overall, texturing was pretty fun but did have some challenges and needed me to think a bit more about how I was approaching things. I am happy with how my character is looking in marmoset especially with the props, which I will properly arrange in unreal. I am hoping that the textures will look similar in unreal as sometimes I find that it is a bit shinier than in marmoset. I would set up the unreal scene but I am very quickly trying to get these textures done to a reasonable standard as I will be going home soon and it will be harder for me to complete work.
Here is how my character is looking in marmoset for the mean time:


No comments:
Post a Comment