14-18/03/22 - Week 10
This week I focused on hair cards, as I lost the week that I was supposed to be learning them I needed to catch up and try to research and understand the method of hair cards as quick as possible so I had time to place them.
I firstly began trying to find tutorials that I understood, I saw several methods being used, the first being creating the hair strands for the haircard alpha itself using Xgen. Xgen was used to place a small amount of hair on a plane and then arranged to create segments of hair, these were then placed by hand. The next method was to place the Xgen strands by hand onto the scalp of the mesh and then generate the planes themselves that way, this would also include the first method. I saw another variation of this using designer to create the hair strands and then use Xgen to generate or Maya/Max to hand place these.
I first tried the second method mentioned, I followed a tutorial by UIW 3D Animation and Game Design which you can find here:
https://www.youtube.com/watch?v=D1XwvcMTIfQ&list=PLklk5VvcgwJCTorNMvCWx_Faby5ZQ-3Wr&ab_channel=UIW3DAnimationandGameDesign
And find the channel here:
https://www.youtube.com/channel/UCtPWysj7NXUFvjqrnGGC9VQ
This tutorial followed setting up in Maya for Xgen and creating your scalp asset then drawing on curves to convert into strands for the hair to follow. This wasnt too difficult though I hadn't used Maya before so there was quite a bit to learn before I was ready to get into it properly. I initially did a test run using this method but maya ended up crashing and as I learnt it doesn't autosave unless you turn it on and most people don't use this due to Maya's limitations and heavy storage usage.
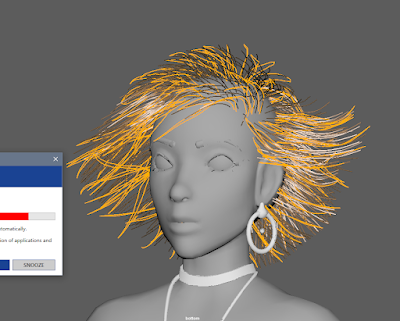
I then tried this method again the next day and came out with an interesting result, though I could already see this being somewhat difficult to understand and use to create the shapes that my character's hair has.
Initial testing,
With a few tweaks and trying to use masks and many other intricate methods I came out with this result which I was definitely not happy with. I found Xgen had a lot of limitations when trying to use it this way and this method overall was not the right one for the type of hair I was trying to create. With this in mind and not wanting to spend too much more time on trying to work with Xgen this way, I went back to the drawing board and tried to think of a better method. I ended up doing more research into haircards and asking some other character artists and found that it was more of a common thing to use Xgen purely for the hair strand generation and not for the hair cards themselves, these are usually hand placed. I thought this was quite surprising but once I had experienced Xgen this way I really understood why this was the case. I was very glad that I had learnt it in a very basic manner though as I thought it would be much more complicated than it in fact is.
I then debated my options on whether to create the hair cards using Xgen or designer, I think in terms of reliability and getting the effect you want Xgen is a much better choice and with the knowledge of Maya and Xgen that I now have I could definitely follow a tutorial and create Xgen hair strands. For sake of time as I had lost a lot trying a method that in the end just didn't work out, I decided to go down the designer root for my haircards. I used the tutorial mentioned above to direct me here and I was able to create a hair generator which I then created many different hair variations of my own want.
Once this was completed I went into Max and began to hand place the cards. At first I really struggled with this since it didn't make a whole lot of sense to me how the hair on my ref was actually working or would work in a 3D space. I found a lot of reference and tried as hard as I could but in the end it wasn't looking how I wanted it to and I was growing very impatient with it.
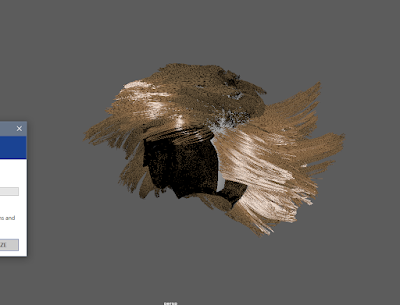
My first attempt.
I then tried again this time with more and better reference that mirrored the style of the hair on the reference a lot better so I could sort of understand what was happening. I was mainly struggling with the volume of the hair but I solved this by adding a lot more layers and faking it with the curve of the hair. I then added in a lot of flyaways and general detail to come up with a somewhat similar version of the hair as to the original reference. I did struggle mostly with the back of the hair and looking on it now I think I can think of a lot of better ways to have approached this, since I have never placed hair cards before I think my effort is alright and I know I can do better if given more time and another chance.
Here are the results in marmoset viewer, I think with the shader and colour applied to it it looks a lot better than it does in Max and I am actually quite happy with it. Seeing it on my character is really cool and I am happy that this is starting to come together now as I can finally see some progress again. If I get more time I do want to work further into the hair and add some more flyaways and work on the overall placement of the hair.
Next week I will move onto texturing so I will be continuing on with Nia, I also want to try to create a hair shader for her in engine so I can start to plan how the character is going to look presentation wise. This will also direct me if I need to extensively change anything to do with the hair.
Here is my plan:
As you can see I hope to be finished around mid week so I can have time to make any adjustments and put Nia into engine to round off the week.


.PNG)

.PNG)
.PNG)


No comments:
Post a Comment